Tuesday, October 30, 2012

Lemon Ginger Zucchini Bread


As of late I've had two things on my brain, vegetables, and healthy baking. I have decided that if I'm going healthy this is going to be my extreme favorite of guilty pleasures. Lemon Ginger Zucchinni Bread! It's hearty, and has whole wheat flour in it! As well was candid ginger.

I found it on one of my most favorites of  favorited blogs. 3191milesapart. They the are two lovely ladies who wrote this wonderful book A Year of Mornings and a few other new collaberations. Maria Alexandra Vettese (MAV) and Stephanie Congdon Barnes (SCB). Their blog as well as their books are absolutely beautiful, I would recommend checking them out! Maybe even spending the day looking throughout their blog like I do.


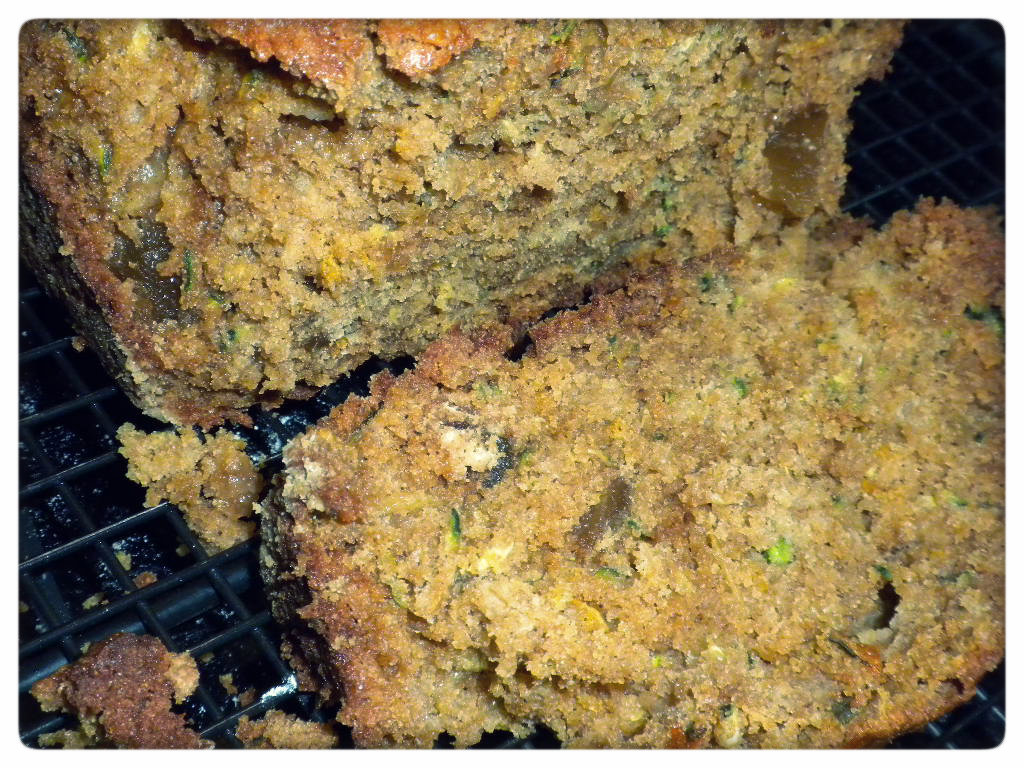
All of these things tie into eachother! The colors, green zucchini, yellow ginger, the brown sugar and whole wheat flour add to it and create a smooth and beautiful brown that really comes out when the bread browns on the top in the oven. Zucchini and Whole wheat = healthy, Lemon = tastey, and Ginger = Laura's favorite accent spice EVER. Combimed together equals the most delicious savory and a little sweet bread loaf I have yet to come across. Bake it. Eat it. Share it. Then freeze it!


I used Whole Wheat Pastry flour instead of Whole Wheat, because whole wheat has a thicker texture, where as the pastry flour is thinner so you'll still get the whole wheat flavor without a grainy texture. I also used the grater on our food processor and found that it was as easy as one, two, three! No cut fingers, and you can avoid the zucchini that can turn to mush when using a hand held grater.


Lemon Ginger Zucchini Bread

1/2 cup (1 stick) unsalted butter, softened
1 cup dark brown sugar
2 eggs
2 cups grated zucchini
1 cup all purpose flour
1 cup whole wheat pastry flour
1 teaspoon baking powder
1 teaspoon baking soda
1/2 teaspoon kosher salt
1 teaspoon cinnamon
2 teaspoons lemon zest
1/2 cup crystalized ginger ( found mine at PCC, I believe you can find it at Trader Joe's too)


Preheat oven to 350 degrees F. Butter and flour a large loaf pan, 9" x 5".

Place grated zucchini in a towel and wring out as much moisture as possible. Cream butter and brown sugar in a mixer until fluffy. Add eggs, mix to combine, add zucchini.

In separate bowl, mix together flours, baking soda and powder, salt and cinnamon. Toss in crystalized ginger and lemon zest. Make sure the ginger pieces are coated with flour, so they won't stick together.

Add the dry to the wet ingredients and stir to combine. Fill the prepared pan with the batter.

Bake for 45-60 minutes or until toothpick comes out cleanly and the loaf is nicely browned on top.

Store bread at room temperature, or slice up and freeze for a nice treat later on!


From: (3191milesapart)


Wednesday, September 19, 2012

Almost Fall


Fall has been visting us in Seattle. Seeping through the defined line of summer and turning into fall, through the leaves changing colour and getting darker earlier.
Now is the time for light jackets, long pants, and boots, boots, boots. Then comes the rain and having everything be dark by 5 or 6:30pm.
I start school on the 24th. Not so sure that I'm ready for it, but I know I'll go into it with an open mind and open arms.


Loving the sunshine, but craving the curl-up-with-a-book and warm socks weather. This month I've got popcorn on the brain.


Mmmm mmmm yummy

Honey Caramel Corn
 
10 - 12 cups popped popcorn (around 1/2 cup kernels)
1 cup toasted pine nuts
1/4 cup butter
1/2 cup dark brown sugar
1/2 cup honey
1 teaspoon vanilla
1/4 teaspoon baking soda
Sea salt
 
 
Melt butter, sugar and honey over medium heat in a medium saucepan. When mixture reaches a boil, reduce heat and simmer for three minutes. Take off heat and stir in vanilla and baking soda (the mixture will foam a little bit when you add in the baking soda) In a large bowl, toss popcorn, nuts (we went sans nuts this time) and caramel mixture to thoroughly coat. Preheat oven to 250 degrees. Spread popcorn on a parchment-lined baking sheet. Sprinkle with seat salt. Bake in oven for 45 minutes, making sure to stir at the halfway point. Allow to cool, break apart and store in an air-tight container.


(Adapted from: 3191 Miles Apart)

Wednesday, September 5, 2012

Dungeness Crab Cakes with Orange Tarragon Butter Sauce


Monday night I successfully hosted a dinner party!

With two of my very best friends, kind of a last (but not really the last) shi-bang before we all go our different ways for college. We made a three course dinner plan and all of it turned out fabulous. For appetizers I made Crab Cakes, Jenny (on the left!) made a delicious Caesar Salad, and for the main course, Simona (on the right!) made Steak Gyros! Mmm mm mmmmm! So good!

It was so great to hang out and to cook together. In Simona's words...in the kitchen I'm known as a little bossy (oops!) But I didn't get that vibe this time. It was all laughs and lots of pictures. :) In between courses we huddled together onto my tiny, tiny, couch and watched episodes of Supernatural. Two episdoes later...."anyone hungry?" "Let's make Gyros!" Four episodes later, "Ice cream?" Yes.
So...we sat at the table for the Crab Cakes and then migrated to the couch after that. But that's what I love, a well planned dinner party with lots of Supernatural episodes, lots of laughs, and memories I'll never forget. Here's to all of the dinner parties to come!


Dungeness Crab Cakes   (Prep Crab Cakes first, then make sauce)
with orange tarragon butter sauce
Serves 4 as a main course. 6 to 8 as an appetizer.

10 ounces cooked Dungeness crabmeat, fresh or frozen
1 1/2 cups panko bread crumbs
3 tablespoons diced red bell pepper, we used orange! ahhh food police!3 tablespoons diced shallots
3 tablespoons chopped parsley, skipped it this time
3 tablespoons fresh lemon juice
1 tablespoon dry sherry
1/4 cup heavy cream
1 large egg
Pinch kosher salt
Pinch ground white pepper
Dash Tabasco sauce
Pinch celery salt
1/2 teaspoon paprika
4 tablespoons clarified butter or canola oil


Prep
Thaw crabmeat if frozen. Gently squeeze crabmeat to remove excess moisture, breaking up any larger pieces.

In a large bowl, mix together 3/4 cup of the panko (reserving the remaining 3/4 cup for coating), bell pepper, shallots, parsley, lemon juice, sherry, cream, egg, salt, pepper, Tabasco, celery salt and paprika. Combine thoroughly to make a batter. Add crabmeat and mix well. Divide mixture into 8 (or 12) balls. Using hangs, form patties and coat with the remaining panko. Refrigerate until well chilled, about 1 hour.


** While your crab cakes are chilling in the refridgerator lets switch to making the Orange Tarragon Sauce!

Orange Tarragon Butter Sauce
Yield: 1 cup

1 teaspoon canola oil
2 tablespoons finely chopped shallots
1 cup Chardonnay
1 cup orange juice
1/2 cup heavy cream
2 tablespoons fresh tarragon leaves (about 5 sprigs), chopped, or 1 tablespoon dried tarragon
1/4 pound unsalted butter at room temperature, cut into small pieces
Kosher salt
Freshly ground white pepper


In a wide 2-quart saute pan, heat oil over medium heat and saute shallots until translucent. Add wine and orange juice. Bring mixture to a roiling boil. Reduce heat to medium and boil gently, stirring occasionally, until mixture reduces to about 3/4 cup of liquid, about 15 to 20 minutes. Add cream and bring to a boil again. Reduce heat to medium and boil gently, stirring occasionally, until about 3/4 cup liquid remains, about 10 to 12 mintues. Add tarragon and stir. Add butter a piece at a time, stirring until well incorporated. Remove from heat. Season with salt and pepper to taste. Serve immediately.

** Back to the Crab Cakes!

In a large skillet or nonstick pan, heat clarified butter or oil over medium-high heat until it begins to smoke. Reduce heat to medium and add crab cakes. Sear until coating is golden brown and lightly crispy, about 3 to 4 minutes on each side. Add more butter or oil as needed to the pan to prevent crab cakes from sticking.
Serve with Orange Tarragon Butter Sauce. 


Enjoy everyone!


xxo Laura

Tuesday, September 4, 2012

Do you guys like the new layout?

It's very pink.....but also something new! I'll try it out and see how it goes.


Sorry I've beem MIA, but I have stories and recipes and my oh my. Everything good :) Headed to bed now, but new posts start tomorrow!
Excited? I AM.

xxo Laura

Wednesday, July 11, 2012

Homemade Honey Lavender Icecream


Molly Moon's at home! Two weeks before summer started... we've been working on ice cream in my Culinary Arts class and I had a need, a need to make ice cream at home. I had a couple titles in mind, having looked... no, more like dug through the entire cookbook section at Barnes and Noble for the book I came for and alas! It was no where to be found. But luckily I stumbled across this lovely! And swiftly it was bought and taken home, and has now been used for it's very first time for my favorite Molly Moon's recipe, Honey Lavender. 

Although I'm still debating with myself on wheather or not its fair to post the recipe for Honey Lavender online.

~ It turned out delicious, but it needed to be churned longer, seeing as it had the consistency of soft serve ice cream and started to melt after being out of the freezer for about 30 seconds. Alas! I won't give up until I've made the perfect icecream!!!

Monday, July 2, 2012

Marshmallows are messy.

Unexpected.
Fun nevertheless, but definitley unexpected.

Ooey Gooey MARSHMALLOWS. With the up coming fourth of july I wanted to make homemade s'mores makings (minus the chocolate). That began today with my first marshmallow makings. Let me tell you, totally, utterly unexpectable. Good, and I'm extremely proud of myself for making marshmallows at home. Got the mallows down, now on to the graham crackers.

My crafty solution to an unclipable thermometer. Tada!
Marshmallowies becoming Marshmallows!

The mess that follows when transferring from bowl to pan


Almost finished product. Setting in the pan before being cut up.


Marshmallows Makes 36 medium or 16 large
Time Commitment: 2 hours

2/3 cup water, divided
3 (1/4 ounce) envelopes unflavored gelatin
1 cup granulated sugar

1 cup light corn syrup
1 tsp pure vanilla extract
1 cup confectioners' sugar

Toppings ~1 cup confectioners' sugar, sifted
1 cup unsweetened cocoa powder, sifted
1 1/2 cup sweetened shredded coconut, toastedPrepLightly oil the inside of an 8 by 8" pan with canola oil. Generously coat with confectioners' sugar, set aside.

Pour 1/3 cup of the water into the bowl of a stand-mixer. Sprinkle the gelatin over the water, and let stand for about 10 minutes, or until gelitan has softened.

In sauce pan, off heat, combine remaining 1/3 cup water and granulated sugar, corn syrup, and salt. Place the pan over medium-high heat. Clip a candy thermometer to the inside of the pan and make sure it does not touch the bottom. Cook mixture without stirring until it reaches 240 °F. Brush down the sides of the pan with a pastry brush, dipped in water, to gently wipe away any residual sugar crystals.

With the mixture on low speed very carefully add the hot syrup to the softened gelatin. Add the vanilla, increase the speed to medium-high and beat for 8 - 13 minutes, until mix becomes very white as well as stiff and sticky.

This is where you prepare yourself for things to get messy. (See pictures below for reference.)Spread mixture into prepared pan using a lightly oiled spatula. Harder than it sounds. An extra pair of hands would be highly recommended at this point. With wet hands, press batter evenly into the corners of the pan. Set aside for 1 hour, until firm and cool.


Sift powdered sugar into a small bowl. Run a wet knife around pan and remove marshmallows, then cut them up, to whatever sizes of your choosing.


How to Store:
Layer with wax paper. In an air-tight container for up to 1 month. :) :)


Although this recipe is incredibly messy... it is entirely worth it! I've been testing (eating is more like it) the mallows and yum, yum, yum! They're goooood. I didn't cut the up, kind of just pulled pieces off.


Saturday, June 30, 2012

Orange Spice Sipping Chocolate Review


Also known as Theo hot chocolate! :)


I've fallen in loooooove. Sweet, yummy dark chocolate loooooooove. Hot chocolate....in June? Say Whaat? Well here in Seattle, it's muggy, rainy, and icky. It seems like every sunny day we get, we're then punished with two more weeks of dark and rainy weather. I say, no bueno! Here's the scoop; this past week I've been babysitting my Culinary Arts Chef's daughter. :) And of course she has all of these fun and extremely cool foodie things. She had a container of it open, told me to try it, and I did and instantly fell in love with it, and she gave me an unopened container!! How sweet is that?
It's as thick as making your own homemade hot chocolate tends to be but you can also vary the thickness of it by how much chocolate you put into each serving too! Tehehe, well I wanted to express my love for Theo's Organic Orange Spice Sipping Chocolate and all of it's thick, chocolately loveliness it contains. :) It has 11 servings and is also fairly inexpensive!


One Serving calls for
1/2 cup milk (or any dairy alternative) heated in a small pot over medium heat until steaming
Then add 3 Tbs of the sipping chocolate (or more if you want it thicker), whisk that in
and then drink away! :)
Yum nom


(Theo picture borrowed from Fig and Walnut)